How to Identify a Tree by Photo (Step-by-Step)
You’re standing in front of a tree you’ve never seen before. Maybe it’s in your new backyard, along a trail, or shading a park bench. You pull out your phone, snap a photo, and within seconds you know exactly what species it is. That’s how photo-based tree identification works in 2026, and it’s changed the way hikers, gardeners, and curious people interact with the trees around them.
This guide covers how to identify a tree by photo — what the technology actually does, how to take photos that produce accurate results, and which parts of the tree to photograph for the best match.
How AI-Powered Tree Identification From Photos Works
Modern tree identification apps use image recognition models trained on millions of photographs. When you submit a photo, the AI compares visual patterns in your image against a database of known species. It looks at shape, color, texture, vein structure, and dozens of other features that the human eye might miss or struggle to articulate.
The result is a species match with a confidence score. A high score (above 90%) means the AI found strong visual overlap with a known species. A lower score means the image was ambiguous — maybe the photo was blurry, the angle was unusual, or the species has close lookalikes.
This isn’t guesswork. These models have been trained on photographs from every angle, in every season, and across thousands of species. They handle variation better than printed reference books because they’ve “seen” far more examples than any single human expert.
What Makes a Good Photo for Tree Identification
Not all photos are equal. The difference between a confident match and a vague suggestion often comes down to how you photograph the tree. Here’s what matters.
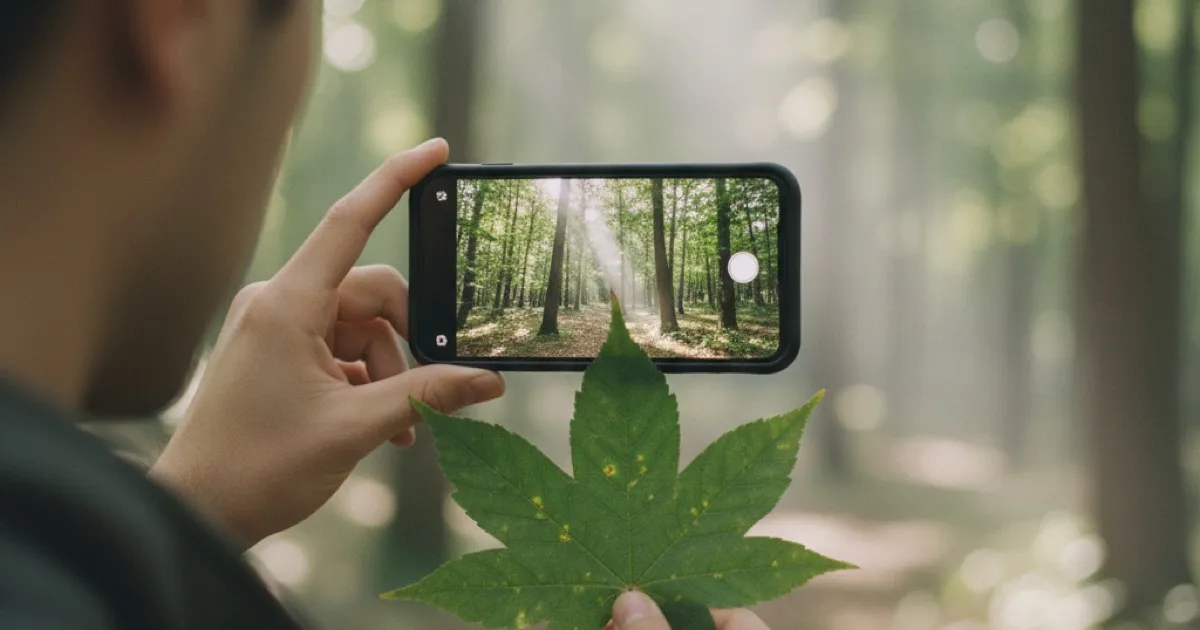
Fill the frame. Get close enough that the subject — a leaf, a piece of bark, a flower cluster — fills most of the image. A tiny leaf in the center of a wide landscape shot gives the AI very little to work with.
Use natural light. Harsh shadows obscure texture and color. Overcast days are ideal for leaf and bark photos because the light is even. If it’s sunny, try to photograph on the shaded side of the tree, or use your body to block direct sunlight on the subject.
Hold steady. Blur is the single biggest cause of poor results. If your phone’s camera has trouble focusing, tap the screen on the subject to lock focus before shooting. A sharp photo of a common oak leaf will outperform a blurry photo of the rarest specimen.
Avoid clutter in the background. A leaf held against a plain surface (your palm, a notebook, the ground) is easier for AI to isolate than a leaf still on the branch surrounded by other foliage. When photographing bark, step close enough that the background disappears.
Show scale when possible. Placing a coin or your finger next to a leaf or flower gives additional context. A 2-inch leaf and a 6-inch leaf from different species can look identical at certain zoom levels. For detailed tips on framing and lighting, check out our guide on how to take perfect tree photos for identification.
Which Parts of the Tree to Photograph to Identify It by Photo
Different parts of the tree carry different amounts of identifying information. Here’s what to prioritize, ranked by reliability.
Leaves
Leaves are the gold standard for tree identification. They carry species-specific shapes, serration patterns, vein structures, and surface textures. A single, well-lit photo of a mature leaf — showing the full blade and the stem — is often enough for a confident ID.
For compound leaves (like ash or walnut), try to capture the entire leaf structure, not just one leaflet. The number, arrangement, and shape of leaflets are critical clues.
If you’re trying to tell apart similar species like pines, spruces, and firs, needle arrangement matters more than the individual needle. Photograph a section of branch showing how the needles attach.
Bark
Bark is the second most reliable identifier, and it’s available year-round. Every species develops a distinct bark pattern as it matures — smooth, plated, furrowed, peeling, ridged, or shaggy.
Photograph bark at chest height on the trunk (not near the base where it often looks different). Get close enough that the texture fills the frame. Bark identification is especially valuable in winter when leaves and flowers are absent.
Flowers and Fruit
Flowers and fruit narrow identification quickly because they’re so species-specific. A single cherry blossom cluster or maple samara can confirm a species in seconds. The downside: they’re seasonal. You won’t find flowers in December or fruit in April for most species.
When photographing fruit, capture size, shape, and color. For flowers, try to show petal count and arrangement. If the flowers grow in clusters, photograph the whole cluster, not a single blossom in isolation.
Whole Tree Shape (Silhouette)
The overall shape of a tree — spreading crown, columnar trunk, weeping branches — is useful as a supplementary clue but rarely sufficient on its own. Many species share similar growth forms, and environment affects shape heavily. A white oak in an open field looks very different from the same species growing in a dense forest.
That said, silhouette photos help the AI when combined with closeup shots. If you can, take both: one wide shot showing the whole tree and one closeup of a leaf or bark section.
Season-by-Season Guide to Identify a Tree by Photo
Your approach should shift with the seasons because available clues change.
Spring: Flowers dominate. Photograph blossoms before they drop — the window is usually 1 to 3 weeks. Young leaves are emerging but may not be fully developed, so flowers are your best bet.
Summer: Leaves are fully mature and at peak reliability. Fruit is developing on many species. This is the easiest season for photo identification because you have the most clues available at once.
Fall: Leaf color change can actually help with identification — different species turn different colors, and fall color is surprisingly species-specific. Photograph leaves before they drop. Fruit and seeds are often ripe and visible.
Winter: Bark and branch structure are your primary tools. Evergreen trees still have needles, making them easier than deciduous species. For leafless deciduous trees, look for persistent fruit, seed pods, or leaf buds. Winter identification is harder, but far from impossible. We cover this in depth in our guide to identifying trees in winter.
Common Mistakes That Lead to Bad Results
Even good photo-based identification tools will struggle if you make these errors.
Photographing a dead or damaged leaf. Dried, curled, or insect-chewed leaves lose the shape and color signals the AI needs. Find a healthy, representative leaf.
Submitting a photo with multiple species. If your photo includes leaves from two different trees, the AI can’t know which one you’re asking about. Isolate one species per photo.
Using extreme zoom or digital crop. Heavy zooming introduces noise and reduces detail. Move physically closer instead of pinching to zoom on your screen.
Photographing in low light. Dusk, dawn, and indoor lighting all shift colors and reduce clarity. Natural daylight produces the best results.
Expecting one photo to cover everything. Sometimes a single leaf photo is enough. Sometimes the AI needs more context. If your first result has a low confidence score, try photographing a different part of the tree — bark, fruit, or a wider shot.
How Tree Identifier Handles Photo-Based Identification
Tree Identifier is built specifically for this use case. You take a photo of any part of a tree — a leaf, a section of bark, a flower, a fruit, or the whole silhouette — and the app returns a species identification with a confidence score, usually within a few seconds.
The app’s AI draws from a database covering thousands of tree species. It also handles wood identification: if you have a piece of lumber, a wood floor, or a cross-cut log, you can photograph the grain and texture to identify the wood species. Most identification apps are limited to living trees and leaves, so this is a significant capability for woodworkers and anyone working with timber.
You get 2 free identifications per day without a subscription. That’s enough to test the accuracy on trees you already know before trusting it on unknowns. If you’re heading somewhere without cell service — a remote trail, a national forest — the app’s offline mode lets you download species data ahead of time so identification still works without internet.
The app runs on both iOS and Android, and your photos stay private on your device.
Frequently Asked Questions
Can I identify a tree from a photo of just the bark?
Yes. Bark carries species-specific patterns — ridges, furrows, plates, peeling strips — that AI models can match. Results tend to be more accurate for mature trees with well-developed bark, while young trees with smooth, undifferentiated bark are harder to distinguish. For the best results, photograph the trunk at chest height in good light.
What time of year gives the most accurate photo identification?
Late spring through early fall, when leaves are fully developed. Summer is the peak because you typically have mature leaves, developing fruit, and sometimes lingering flowers. Winter identification from bark and buds is possible but produces lower confidence scores on average.
How many photos should I take for a reliable identification?
One clear, well-lit photo of a healthy leaf is often enough for a confident match. But if the confidence score is below 85%, take a second photo of a different feature — bark, fruit, or the whole tree silhouette. Multiple inputs give the AI more data points and usually push the confidence higher.
Does the angle of the photo matter?
It does. For leaves, a flat, top-down shot showing the full blade shape is ideal; for bark, shoot straight on so the camera is parallel to the trunk surface. For flowers and fruit, get close enough that the subject fills at least half the frame. Steep angles distort proportions, which can confuse the model.
Start Identifying Trees From Your Photos
You already have everything you need: a phone with a camera and trees worth identifying. Pick the closest unknown tree, photograph a leaf or a piece of bark using the tips above, and run it through Tree Identifier. The whole process takes under a minute, and you’ll know what species you’re looking at before you walk away.
The more trees you identify, the faster you’ll start recognizing species on your own — the app trains your eye as much as it trains the AI.
Rachel Nguyen
Tree Identifier Team